Next.js Magnetic Button: Pull a CTA Toward the Cursor with useSpring
Published: October 8, 2026 · 7 min read
Build a magnetic button in Next.js: offset math, smooth motion with useMotionValue and useSpring, a strength cap, and turning it off for touch and reduced motion.
Build a magnetic button that leans slightly toward the cursor
You are building a portfolio or product landing page in Next.js and want the hero button to stand out a little more. You have seen the effect on other sites: move the cursor near a button and it gets pulled toward it. That is a magnetic button.
Here is the answer. Take the distance between the cursor and the button's center, multiply it by a small factor, and shift the button by that much.
Store the shift in Motion's (formerly Framer Motion) useMotionValue and let useSpring follow it like a spring. When the cursor leaves, the same spring carries the button back home.
This guide covers:
The formula for the offset, based on the pointer position
Smooth follow and return with useMotionValue and useSpring
Why to cap the strength, and sensible numbers
Turning it off on touch devices and for reduced motion, and keeping the click target stable
Why use a magnetic button, and where
The job of this effect is to pull attention to the one button you most want clicked. There are two reasons it works.
First, reacting to the cursor signals that the button is clickable. It responds a little before the cursor arrives, so people notice sooner than with a color-only hover.
Second, a single moving element on a calm page stands out.
So use it on one main CTA per page (the button you most want pressed, like a signup). The hero button or the final signup button are good fits.
Leave it off nav links and buttons in a grid of cards. When everything moves, nothing looks important.
Step 1: Calculate the magnetic button offset from the pointer
Start with a function that works out how far to shift the button. It is pure math with no UI dependency, so it can live in a plain TypeScript file.
The idea is simply the pointer's distance from the center times a factor. With a factor of 0.3, a cursor 20px right of center moves the button 6px to the right.
type Box = { left: number; top: number; width: number; height: number };

// strength: how strongly it pulls (0-1) / max: offset cap in px
export function getMagneticOffset(
  pointer: { x: number; y: number },
  box: Box,
  strength = 0.3,
  max = 12,
) {
  const centerX = box.left + box.width / 2;
  const centerY = box.top + box.height / 2;
  const clamp = (value: number) => Math.max(-max, Math.min(max, value));

  return {
    x: clamp((pointer.x - centerX) * strength),
    y: clamp((pointer.y - centerY) * strength),
  };
}
Always cap the offset
A factor alone makes big buttons travel far. The right edge of a 240px-wide button is 120px from center, so a factor of 0.3 shifts it 36px.
That makes the label hard to read and pushes it into neighboring elements. A cap of around 8 to 12px keeps the pull noticeable without breaking the button's shape.
Measure a wrapper that does not move
If you measure the button itself, its center moves every time it shifts. The math then recalculates from the shifted position, and the motion can jitter.
Instead, measure a stationary wrapper and move only the button inside. Step 2 is built that way.
Step 2: Move the magnetic button with useMotionValue and useSpring
Next, build the button component. It listens to pointer movement, so add "use client" (the marker for browser-side code) at the top.
useMotionValue is a Motion container you can update without re-rendering. useSpring chases that value with spring physics, so setting it back to 0 glides the button home.
"use client";

import Link from "next/link";
import { useRef, type PointerEvent, type ReactNode } from "react";
import { motion, useMotionValue, useReducedMotion, useSpring } from "motion/react";
import { getMagneticOffset } from "@/lib/magnetic";

const spring = { stiffness: 250, damping: 18, mass: 0.5 };

type Props = { href: string; children: ReactNode };

export function MagneticButton({ href, children }: Props) {
  const areaRef = useRef<HTMLDivElement>(null);
  const x = useMotionValue(0);
  const y = useMotionValue(0);
  const springX = useSpring(x, spring);
  const springY = useSpring(y, spring);

  const reduceMotion = useReducedMotion();
  const enabled = !reduceMotion; // Step 3 adds the touch-device check

  function handlePointerMove(event: PointerEvent<HTMLDivElement>) {
    if (!enabled || event.pointerType !== "mouse" || !areaRef.current) return;
    // Measure the stationary wrapper. Measuring the button itself causes jitter
    const box = areaRef.current.getBoundingClientRect();
    const offset = getMagneticOffset({ x: event.clientX, y: event.clientY }, box);
    x.set(offset.x);
    y.set(offset.y);
  }

  function handlePointerLeave() {
    x.set(0);
    y.set(0);
  }

  return (
    <div
      ref={areaRef}
      onPointerMove={handlePointerMove}
      onPointerLeave={handlePointerLeave}
      className="-m-4 inline-block p-4"
    >
      <motion.div style={{ x: springX, y: springY }} className="inline-block">
        <Link
          href={href}
          className="inline-flex min-h-11 items-center rounded-full bg-zinc-900 px-7 text-sm font-medium text-white focus-visible:outline focus-visible:outline-2 focus-visible:outline-offset-4 focus-visible:outline-zinc-900"
        >
          {children}
        </Link>
      </motion.div>
    </div>
  );
}
Key points in the code
p-4 with -m-4 on the wrapper makes it react from 16px around the button without shifting the surrounding layout
Pointer moves only update values, so the component never re-renders while it moves
It moves only when pointerType is mouse, so finger taps do nothing
Leaving the wrapper resets to 0, and the spring brings the button back
On a page, use it like <MagneticButton href="/signup">Start free</MagneticButton>.
Tuning the spring
stiffness is how hard the spring pulls, and damping is how much it resists wobble. Higher stiffness follows faster, and lower damping adds a little bounce on the way back.
For buttons, values that do not wobble much are easiest to live with. Start from the numbers in the code and adjust a little at a time.
Keep internal links as Link
The outer motion.div does the moving, and the inside stays a regular next/link Link. Prefetching and the rest of Next.js link behavior keep working.
Step 3: Turn the magnetic button off for touch and reduced motion
Phones and tablets have no cursor. If the button shifts toward the tap point, it looks like it jumps the moment it is pressed.
So check the media query (hover: hover) and (pointer: fine). Without a precise pointer like a mouse, the effect stays off.
When someone has reduced motion turned on in their OS, Motion's useReducedMotion returns true. Turn it off in that case too.
"use client";

import { useSyncExternalStore } from "react";

const QUERY = "(hover: hover) and (pointer: fine)";

function subscribe(onChange: () => void) {
  const media = window.matchMedia(QUERY);
  media.addEventListener("change", onChange);
  return () => media.removeEventListener("change", onChange);
}

export function useFinePointer() {
  return useSyncExternalStore(
    subscribe,
    () => window.matchMedia(QUERY).matches,
    () => false, // On the server, assume no mouse
  );
}
Add the check to the Step 2 component
In the Step 2 component, add const finePointer = useFinePointer();.
Then change the enabled line to const enabled = finePointer && !reduceMotion;.
It returns false during server rendering, so the button starts still on every device. After hydration, only devices with a mouse turn the effect on.
Magnetic button click targets and accessibility
With a moving button, the spot people aim for must still be clickable.
In this setup the button itself moves, so the clickable area moves with what people see. The offset cap is 12px, so it stays inside the wrapper's 16px padding.
Also check the following:
Make the button at least 44px tall so it is easy to tap
Do not remove the keyboard focus ring (focus-visible)
Move only the position, not the font size or color
Write a label that makes sense even without the motion
Common magnetic button mistakes and a pre-launch checklist
Adding it to every button. Only one main CTA should move
Moving it far with no cap. The label becomes unreadable and overlaps neighbors
Measuring the button itself. It jitters, so measure a stationary wrapper
Leaving it on for phones. The button seems to jump on every tap
Ignoring reduced motion. Show a still button to people who ask for it
Putting "use client" on the whole page.tsx. Split out just the button component
Before launch, press it with a mouse, on a phone, and with the keyboard. To replace the cursor itself, see https://design-layer.com/en/articles/nextjs-custom-cursor-guide.
Copy a finished magnetic button
Tuning the spring and the reaction area to fit your button size takes some trial and error.
Another option is to try a finished component in the browser first, then drop it into your own Next.js project.
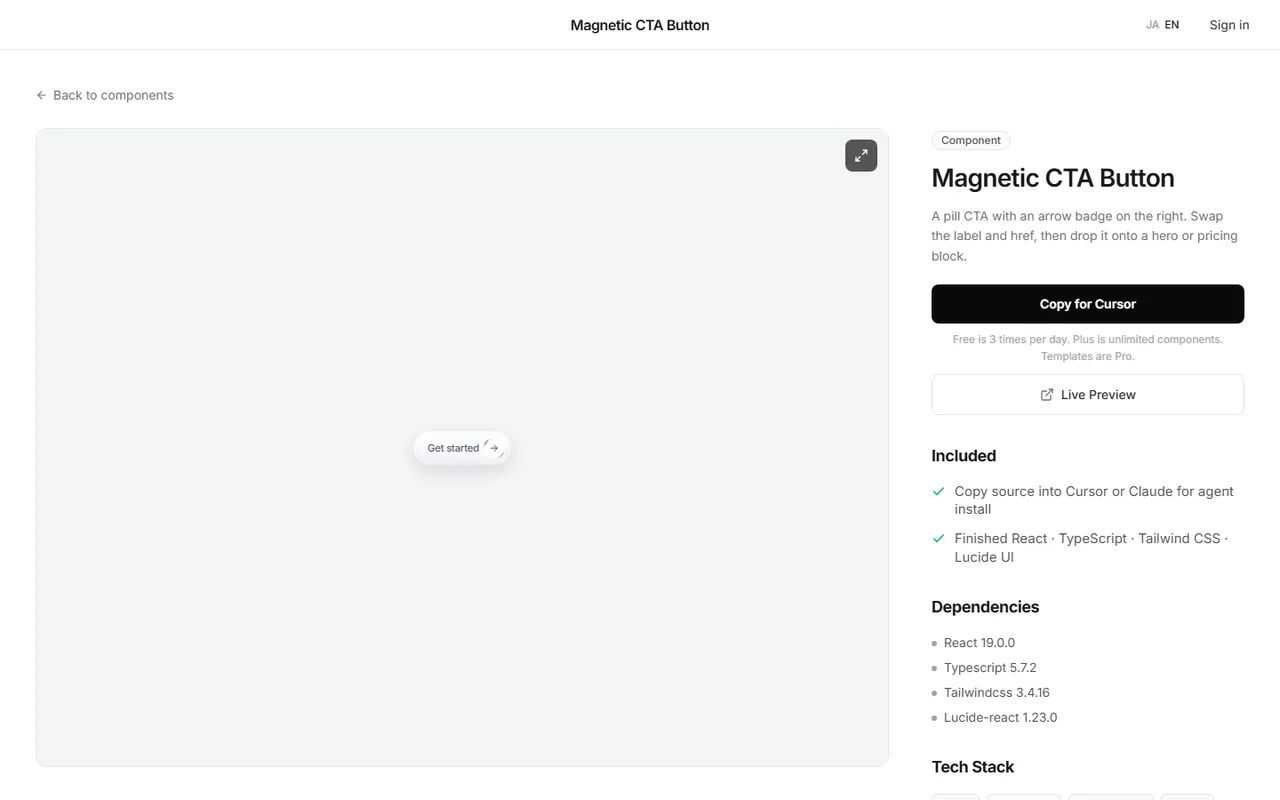
Magnetic CTA Button on DesignLayer is a CTA button that gets pulled toward the cursor. You can feel how it moves in the live preview on its page.
Press Copy for Cursor to copy the integration instructions, the live preview URL, the component TSX, and npm dependencies in one go. Paste them into Cursor or Claude to add it to your project.
Browsing and live previews are free, with no account or card required. Free source copies are limited to three per day (Japan time).
Open the catalog at https://design-layer.com/en/components. Plus (990 yen/month) and Pro (2,980 yen/month) give unlimited component copies.
Magnetic button FAQ
Can I build it without Motion?
Yes. Update transform on pointer move and use a CSS transition to return.
But when the direction changes mid-move, a transition can look choppy. For smooth, spring-like following, Motion's useSpring is the easy route.
How would I do it with GSAP?
gsap.quickTo creates functions that smoothly tween x and y toward a target.
The offset math, the cap, and the conditions for turning it off from this guide carry over unchanged.
Should it stay completely still on phones?
Yes, turning it off is recommended. On touch devices there is no moment where a cursor approaches, so the pull has nothing to respond to.
What strength factor should I use?
Around 0.2 to 0.4 is a good range. With a cap of 8 to 12px, changing the factor will not break the button's shape.
Summary: How to build a magnetic button in Next.js
Use it on one main CTA per page
Compute the offset as pointer-to-center distance times a factor, with a cap
Measure a stationary wrapper and move only the button inside
Put the values in useMotionValue and let useSpring follow and return smoothly
Turn it off without a mouse and for reduced motion
Start by adding the code from Steps 1 and 2 to a single hero button. For motion across the whole hero, see https://design-layer.com/en/articles/nextjs-animated-hero-section-guide, and for Motion basics, https://design-layer.com/en/articles/nextjs-framer-motion-guide.