Next.js Newsletter Signup Form: Server Actions, Status Messages, and Spam Protection
Published: October 8, 2026 · 8 min read
Build a Next.js newsletter signup form: placement and copy, Server Action validation, useActionState states, double opt-in, a honeypot, and a hover animation.
Build a newsletter signup form with one email field and one button
You are building a blog or product site in Next.js and want to send readers updates by email. You add a signup form, but signups barely move. Usually the form asks for too much, or it never says what people will get.
Here is the answer. Keep the form to one email field and one button, and right above it, say what you send and how often.
Handle the submission with a Server Action (a server function a form can call directly). Show the pending, success, and error states with React 19's useActionState.
This guide covers:
Where to place the signup form, and copy that says what readers will get
A Server Action with email validation and spam protection
A form component that switches between pending, success, and error
Confirmation emails (double opt-in), a privacy note, and a button hover animation
Why a newsletter signup form should be short
A signup form exists to catch the moment a reader thinks "I want more of this." There are three reasons to keep it short.
First, every extra field is another chance to stop. You can ask for a name or company later, in a welcome survey.
Second, an email address takes some trust to hand over. Nobody types it into a form that does not say what will arrive.
Third, one field is easy on a phone. The reader can usually just pick their address from the autofill suggestions.
Decide where the newsletter signup form goes and what it says
Before writing code, decide where the form lives and what it says. Once that is settled, the layout mostly follows.
Place it at the end of articles and in the footer
The default spots are the end of an article and the footer. A reader who just enjoyed the content has a reason to want the next one.
Skip the popup that covers the screen on page load. Asking someone who has not read anything yet just gets it closed.
On a product landing page, put a small version near the final signup button. The CTA section guide is at https://design-layer.com/en/articles/nextjs-cta-section-guide.
Say what arrives and how often in the heading
"Subscribe to our newsletter" tells readers nothing about what they will get. Use the heading and one line of description to spell out the content and the frequency.
Heading: One small Next.js recipe, once a week
Description: Sent every Thursday morning. Unsubscribe in one click, anytime
Button: Subscribe (a word that says what happens, rather than "Submit")
Promise a frequency you can keep. Say "weekly" and send monthly, and you lose readers' trust.
Step 1: Write a Server Action for newsletter signups
Start with the function that receives the email address. Put "use server" at the top of the file and its functions run only on the server.
Browser validation is easy to bypass with scripted requests, so always check the format on the server too.
If an address is already subscribed, return the same success message anyway. Replying "already subscribed" lets anyone check whether someone else's address is on your list.
"use server";

import { addSubscriber } from "@/lib/newsletter";

export type SubscribeState = {
  status: "idle" | "success" | "error";
  message: string;
  email?: string;
};

const EMAIL_PATTERN = /^[^\s@]+@[^\s@]+\.[^\s@]+$/;
const SUCCESS_MESSAGE =
  "Check your inbox. Click the link in our email to confirm your subscription.";

export async function subscribe(
  _prevState: SubscribeState,
  formData: FormData,
): Promise<SubscribeState> {
  // A value in the honeypot means a bot. Do not subscribe, but reply as if it worked
  if (formData.get("hp_field")) {
    return { status: "success", message: SUCCESS_MESSAGE };
  }

  const email = String(formData.get("email") ?? "").trim();

  if (email.length > 254 || !EMAIL_PATTERN.test(email)) {
    return {
      status: "error",
      message: "Please check the format of your email address.",
      email,
    };
  }

  try {
    await addSubscriber(email);
  } catch (error) {
    console.error(error);
    return {
      status: "error",
      message: "We could not subscribe you. Please try again in a moment.",
      email,
    };
  }

  return { status: "success", message: SUCCESS_MESSAGE };
}
Block bot signups with a honeypot
A honeypot is an input that humans never see. Bots that fill in every field put a value there.
Give it a name that browser autofill will not recognize. A name like company may get filled in for real readers too.
When it has a value, skip the signup and return the normal success reply. Returning an error would tell the bot what gave it away.
If heavy spam keeps coming, add per-IP rate limiting or a CAPTCHA (a check that the visitor is human).
Wrap the email service call in one function
The real signup goes to your email service's API. Endpoints and fields differ by provider, so adapt this to their official docs.
Keeping the call in one function means switching providers touches one place. If your provider returns an error for existing subscribers, treat that case as success here.
Keep the API key in an environment variable, and do not prefix its name with NEXT_PUBLIC_. That prefix puts the value into code shipped to the browser.
// Adjust the URL, headers, and body to match your email service's API
export async function addSubscriber(email: string) {
  const url = process.env.NEWSLETTER_API_URL;
  const apiKey = process.env.NEWSLETTER_API_KEY;
  if (!url || !apiKey) {
    throw new Error("Newsletter API is not configured");
  }

  const res = await fetch(url, {
    method: "POST",
    headers: {
      "Content-Type": "application/json",
      Authorization: "Bearer " + apiKey,
    },
    body: JSON.stringify({ email }),
  });

  if (!res.ok) {
    throw new Error("Newsletter API error: " + res.status);
  }
}
Step 2: Show newsletter signup states with useActionState
Next, build the form component. It handles submission state on screen, so add "use client" (the marker for browser-side code) at the top.
useActionState is the React 19 hook that returns the action's result and whether it is still running. Pass it the function from Step 1, and whatever that function returns reaches the screen.
"use client";

import Link from "next/link";
import { useActionState } from "react";
import { subscribe, type SubscribeState } from "@/app/actions/subscribe";
import { SubscribeButton } from "@/components/SubscribeButton";

const initialState: SubscribeState = { status: "idle", message: "" };

export function NewsletterForm() {
  const [state, formAction, isPending] = useActionState(subscribe, initialState);
  const hasError = state.status === "error";

  return (
    <section className="mx-auto max-w-xl px-6 py-20">
      <h2 className="text-2xl font-semibold">One small Next.js recipe, once a week</h2>
      <p className="mt-2 text-zinc-600">Sent every Thursday morning. Unsubscribe in one click, anytime.</p>

      {state.status === "success" ? (
        <p role="status" className="mt-6 rounded-xl bg-emerald-50 p-4 text-sm text-emerald-800">
          {state.message}
        </p>
      ) : (
        <form action={formAction} className="relative mt-6">
          <label htmlFor="newsletter-email" className="text-sm font-medium">
            Email address
          </label>
          <div className="mt-2 flex flex-col gap-3 sm:flex-row">
            <input
              id="newsletter-email"
              name="email"
              type="email"
              required
              autoComplete="email"
              placeholder="you@example.com"
              defaultValue={state.email}
              aria-invalid={hasError}
              aria-describedby={hasError ? "newsletter-error" : undefined}
              className="min-h-11 flex-1 rounded-full border border-zinc-300 px-5 text-base outline-none focus:border-zinc-900"
            />
            <SubscribeButton pending={isPending} />
          </div>

          {/* Honeypot: invisible to people, only bots fill it in */}
          <div aria-hidden="true" className="absolute -left-[9999px] h-px w-px overflow-hidden">
            <label htmlFor="newsletter-hp">Leave this field empty</label>
            <input id="newsletter-hp" name="hp_field" type="text" tabIndex={-1} autoComplete="off" />
          </div>

          {hasError && (
            <p id="newsletter-error" role="alert" className="mt-2 text-sm text-red-600">
              {state.message}
            </p>
          )}

          <p className="mt-3 text-xs text-zinc-500">
            We only use your address to send this newsletter.{" "}
            <Link href="/privacy" className="underline underline-offset-2">
              Privacy policy
            </Link>
          </p>
        </form>
      )}
    </section>
  );
}
Key points in the code
type="email" and required let the browser check the format before sending
autoComplete="email" brings up autofill suggestions on phones
aria-describedby ties the error to the input so screen readers announce it
On success the form is replaced by a role="status" message
The form clears after submitting, so on error the typed address comes back through defaultValue
Do not use the placeholder as the label. It disappears as soon as someone starts typing, and the field loses its name.
Disable the button while sending
A second click mid-request sends the same signup twice. While isPending is true, disable the button and change its label to "Sending...".
That switch lives in the button component in Step 3.
Step 3: Add a hover animation to the newsletter signup button
Finally, add some hover motion to the button. The label slides up and out while a copy slides in from below.
Motion (formerly Framer Motion) variants pass the button's hover state down to the label inside. Motion basics are covered at https://design-layer.com/en/articles/nextjs-framer-motion-guide.
"use client";

import { motion, useReducedMotion, type Variants } from "motion/react";

const rollOut: Variants = { rest: { y: "0%" }, hover: { y: "-100%" } };
const rollIn: Variants = { rest: { y: "100%" }, hover: { y: "0%" } };
const transition = { duration: 0.25, ease: "easeOut" } as const;

export function SubscribeButton({ pending }: { pending: boolean }) {
  const reduceMotion = useReducedMotion();
  const label = pending ? "Sending..." : "Subscribe";
  const canAnimate = !reduceMotion && !pending;

  return (
    <motion.button
      type="submit"
      disabled={pending}
      initial="rest"
      animate="rest"
      whileHover={canAnimate ? "hover" : undefined}
      whileFocus={canAnimate ? "hover" : undefined}
      className="inline-flex min-h-11 items-center justify-center rounded-full bg-zinc-900 px-6 text-sm font-medium text-white disabled:cursor-not-allowed disabled:opacity-60"
    >
      <span className="relative block overflow-hidden">
        <motion.span variants={rollOut} transition={transition} className="block">
          {label}
        </motion.span>
        <motion.span
          aria-hidden="true"
          variants={rollIn}
          transition={transition}
          className="absolute inset-0 block"
        >
          {label}
        </motion.span>
      </span>
    </motion.button>
  );
}
Turn the hover off for reduced motion
When someone has reduced motion turned on in their OS, useReducedMotion returns true. In that case, whileHover gets nothing and the label stays still.
Put aria-hidden on the copy that slides in. Without it, screen readers read the button's name twice.
Newsletter signup confirmation emails and the privacy note
If you start sending as soon as the button is pressed, mistyped addresses and other people's addresses get your emails too.
Use your email service's double opt-in setting instead. It sends a confirmation email after signup and only completes the subscription when the link inside is clicked.
With double opt-in, the success message should say "Check your inbox," not "You're subscribed." A short reminder to check the spam folder helps.
Below the form, add one line linking to your privacy policy. Say what the address is used for and that readers can unsubscribe at any time.
Many countries regulate marketing email. Japan's Act on Specified Electronic Mail, for example, requires prior consent and a record of it, plus the sender's name, contact details, and a clear way to unsubscribe in each email.
If your readers live elsewhere, check the rules in their countries as well.
Common newsletter signup form mistakes and a pre-launch checklist
Asking for name, company, and role. Start with one email field and ask the rest later
Using the placeholder as the label. Once typing starts, the field loses its name
Relying on browser validation alone. Check the format on the server too
Showing nothing on success. Tell readers what to do next, like opening the confirmation email
A tiny button. Make it at least 44px tall so it is easy to tap
Putting "use client" on the whole page.tsx. Split out just the form component
Before launch, sign up with your own address. Check how the confirmation email arrives and that the unsubscribe link works.
A contact form can use the same Server Action pattern. See https://design-layer.com/en/articles/nextjs-contact-section-guide.
Copy a finished newsletter signup form
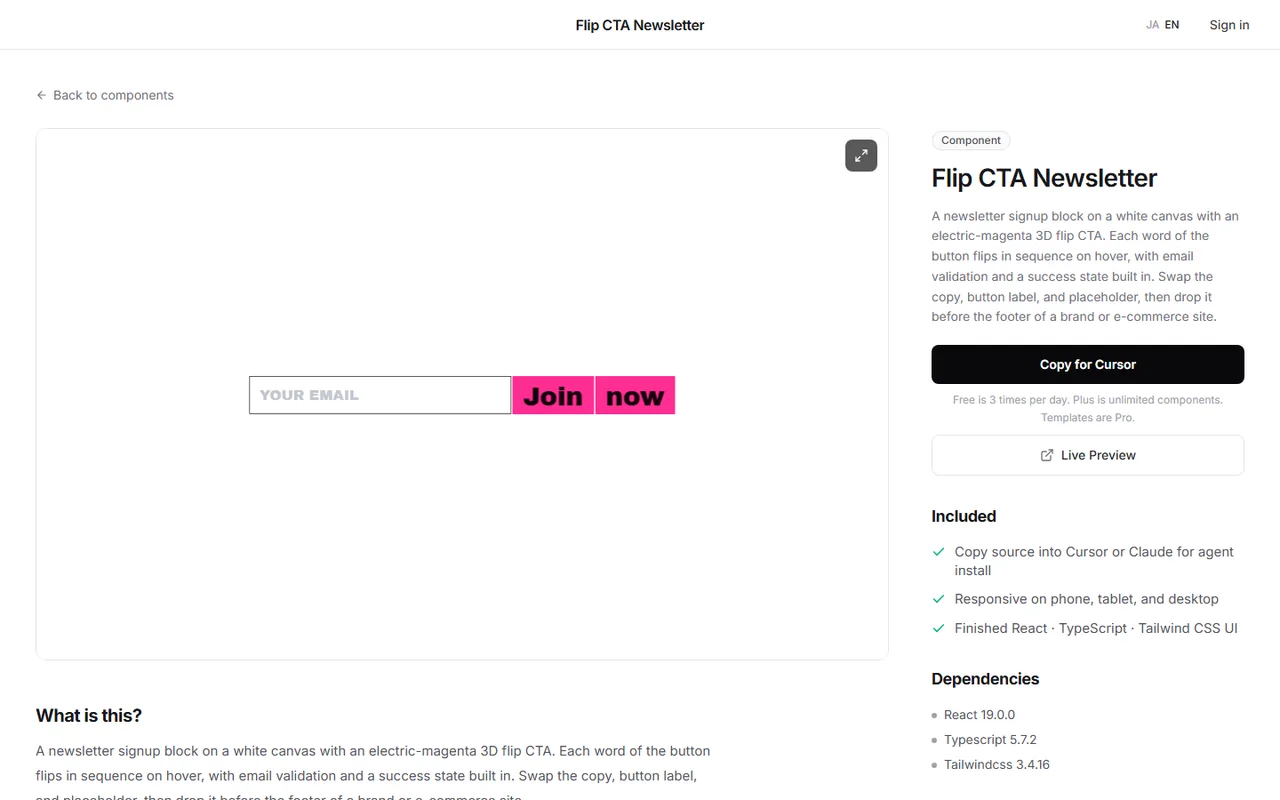
Polishing a 3D flip on the button label and a proper success state takes a while to tune by hand.
Another option is to try a finished section in the browser first, then drop it into your own Next.js project.
Flip CTA Newsletter on DesignLayer is a signup form whose button words flip in 3D on hover. It also includes email validation and a success state.
Press Copy for Cursor on the component page to copy the integration instructions, the live preview URL, the component TSX, and npm dependencies in one go. Paste them into Cursor or Claude to add it to your project.
Browsing and live previews are free, with no account or card required. Free source copies are limited to three per day (Japan time).
Open the catalog at https://design-layer.com/en/components. Once it is in place, connect its submit handling to the Server Action from Step 1 for real signups.
Newsletter signup form FAQ
Do I need a name field on the signup form?
Email alone is enough to start. If you want to greet readers by name, ask for it as an optional question after they sign up.
Can I use a Route Handler instead of a Server Action?
Yes. Write a POST handler in route.ts and send the form with fetch.
With a Server Action, useActionState handles the pending state and error messages for you. For a single form, that is less code.
Is double opt-in required?
It depends on your email service's terms and the laws where your readers live.
It blocks typos and fake signups, so when in doubt, turn it on.
Which email service should I use?
Any service that can add subscribers through an API works with the pattern in this guide.
Check that it supports double opt-in and unsubscribe links, along with its pricing.
Summary: How to build a newsletter signup form in Next.js
Place it at the end of articles and in the footer. Skip the on-load popup
One email field and one button. Say what arrives and how often in the heading
Validate in a Server Action and catch bots with a honeypot
Switch between pending, success, and error with useActionState
Add confirmation emails and a privacy line, and keep the button hover subtle
Start by subscribing your own address with the code from Steps 1 and 2. To make a button pull toward the cursor, see https://design-layer.com/en/articles/nextjs-magnetic-button-guide.